8 Getting familiar with Tercen Studio
Prerequisites
Before you begin, make sure you have the following prerequisites:
- Basic understanding of Python programming.
- Familiarity with Git and GitHub.
- Tercen Studio development environment installed. Follow the instructions in the Tercen Studio GitHub repository to set up the environment.
Getting started
Step 1: Set Up a Development Data Step
Go to Tercen local instance: http://127.0.0.1:5402/
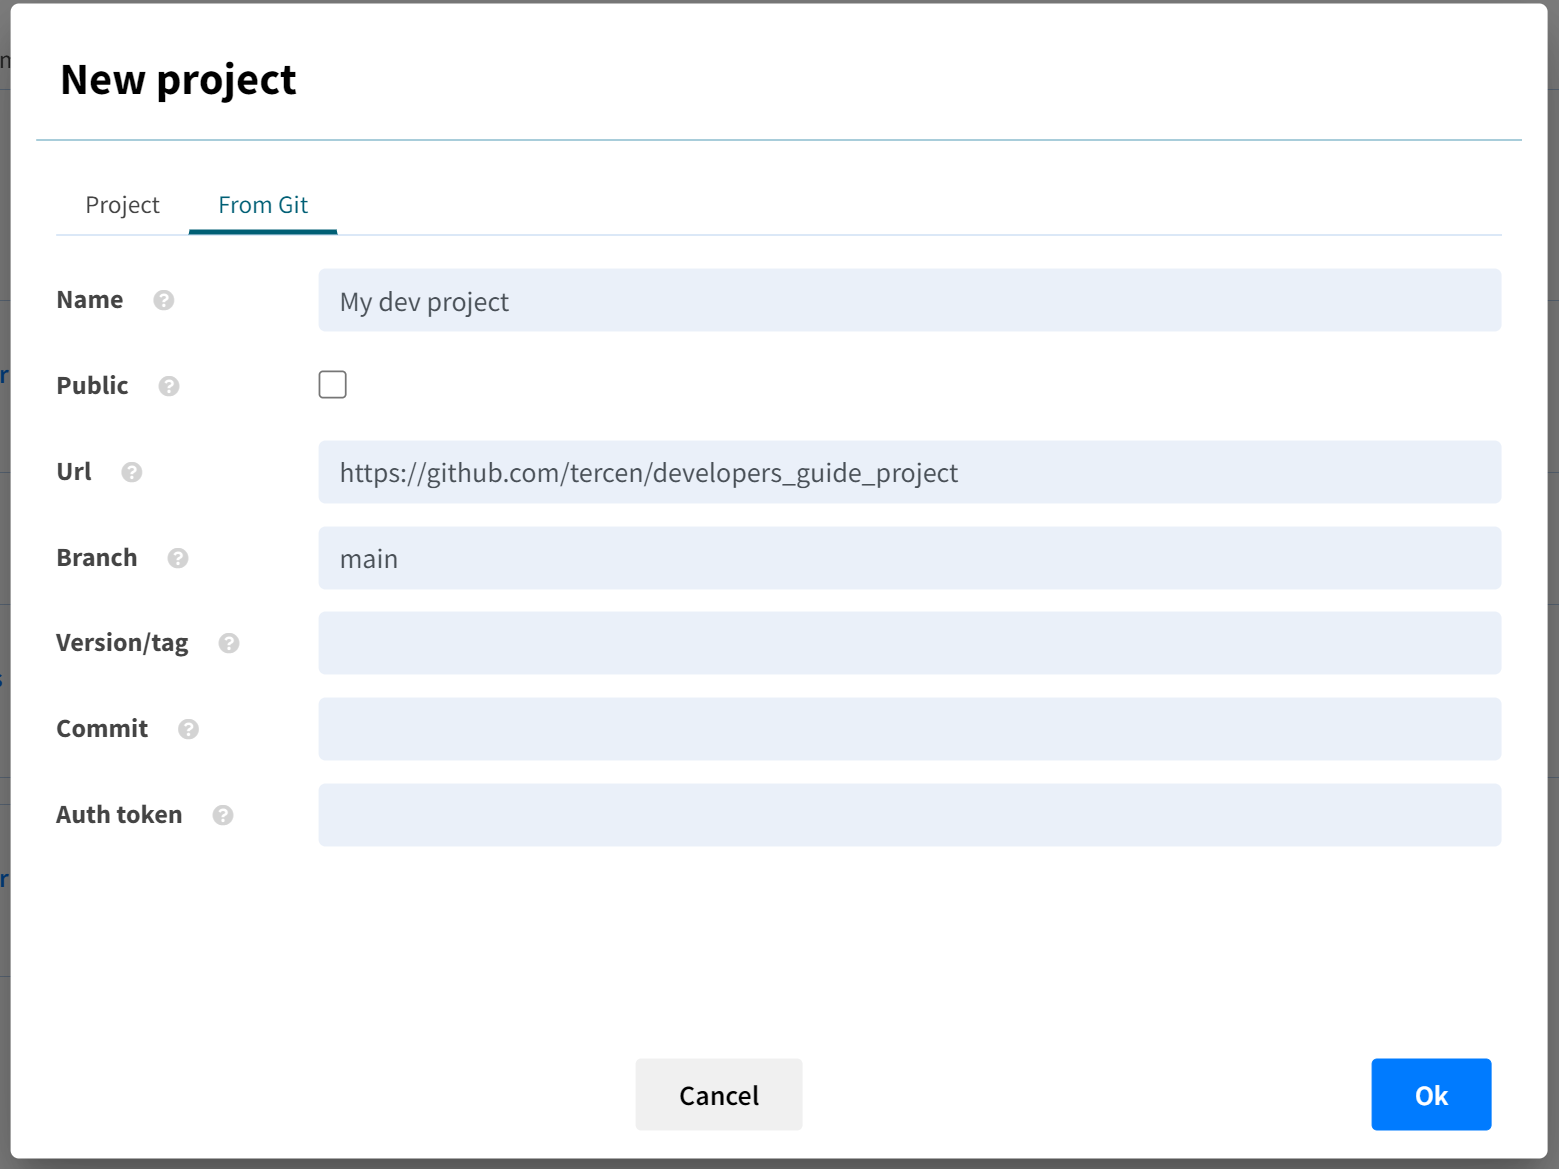
Create a project by clicking on New project
Click on the From git tab and create a new project from
https://github.com/tercen/developers_guide_projectas follows:

This action will populate a new project that contains an example dataset (Crabs) and a small workflow to get started with development.
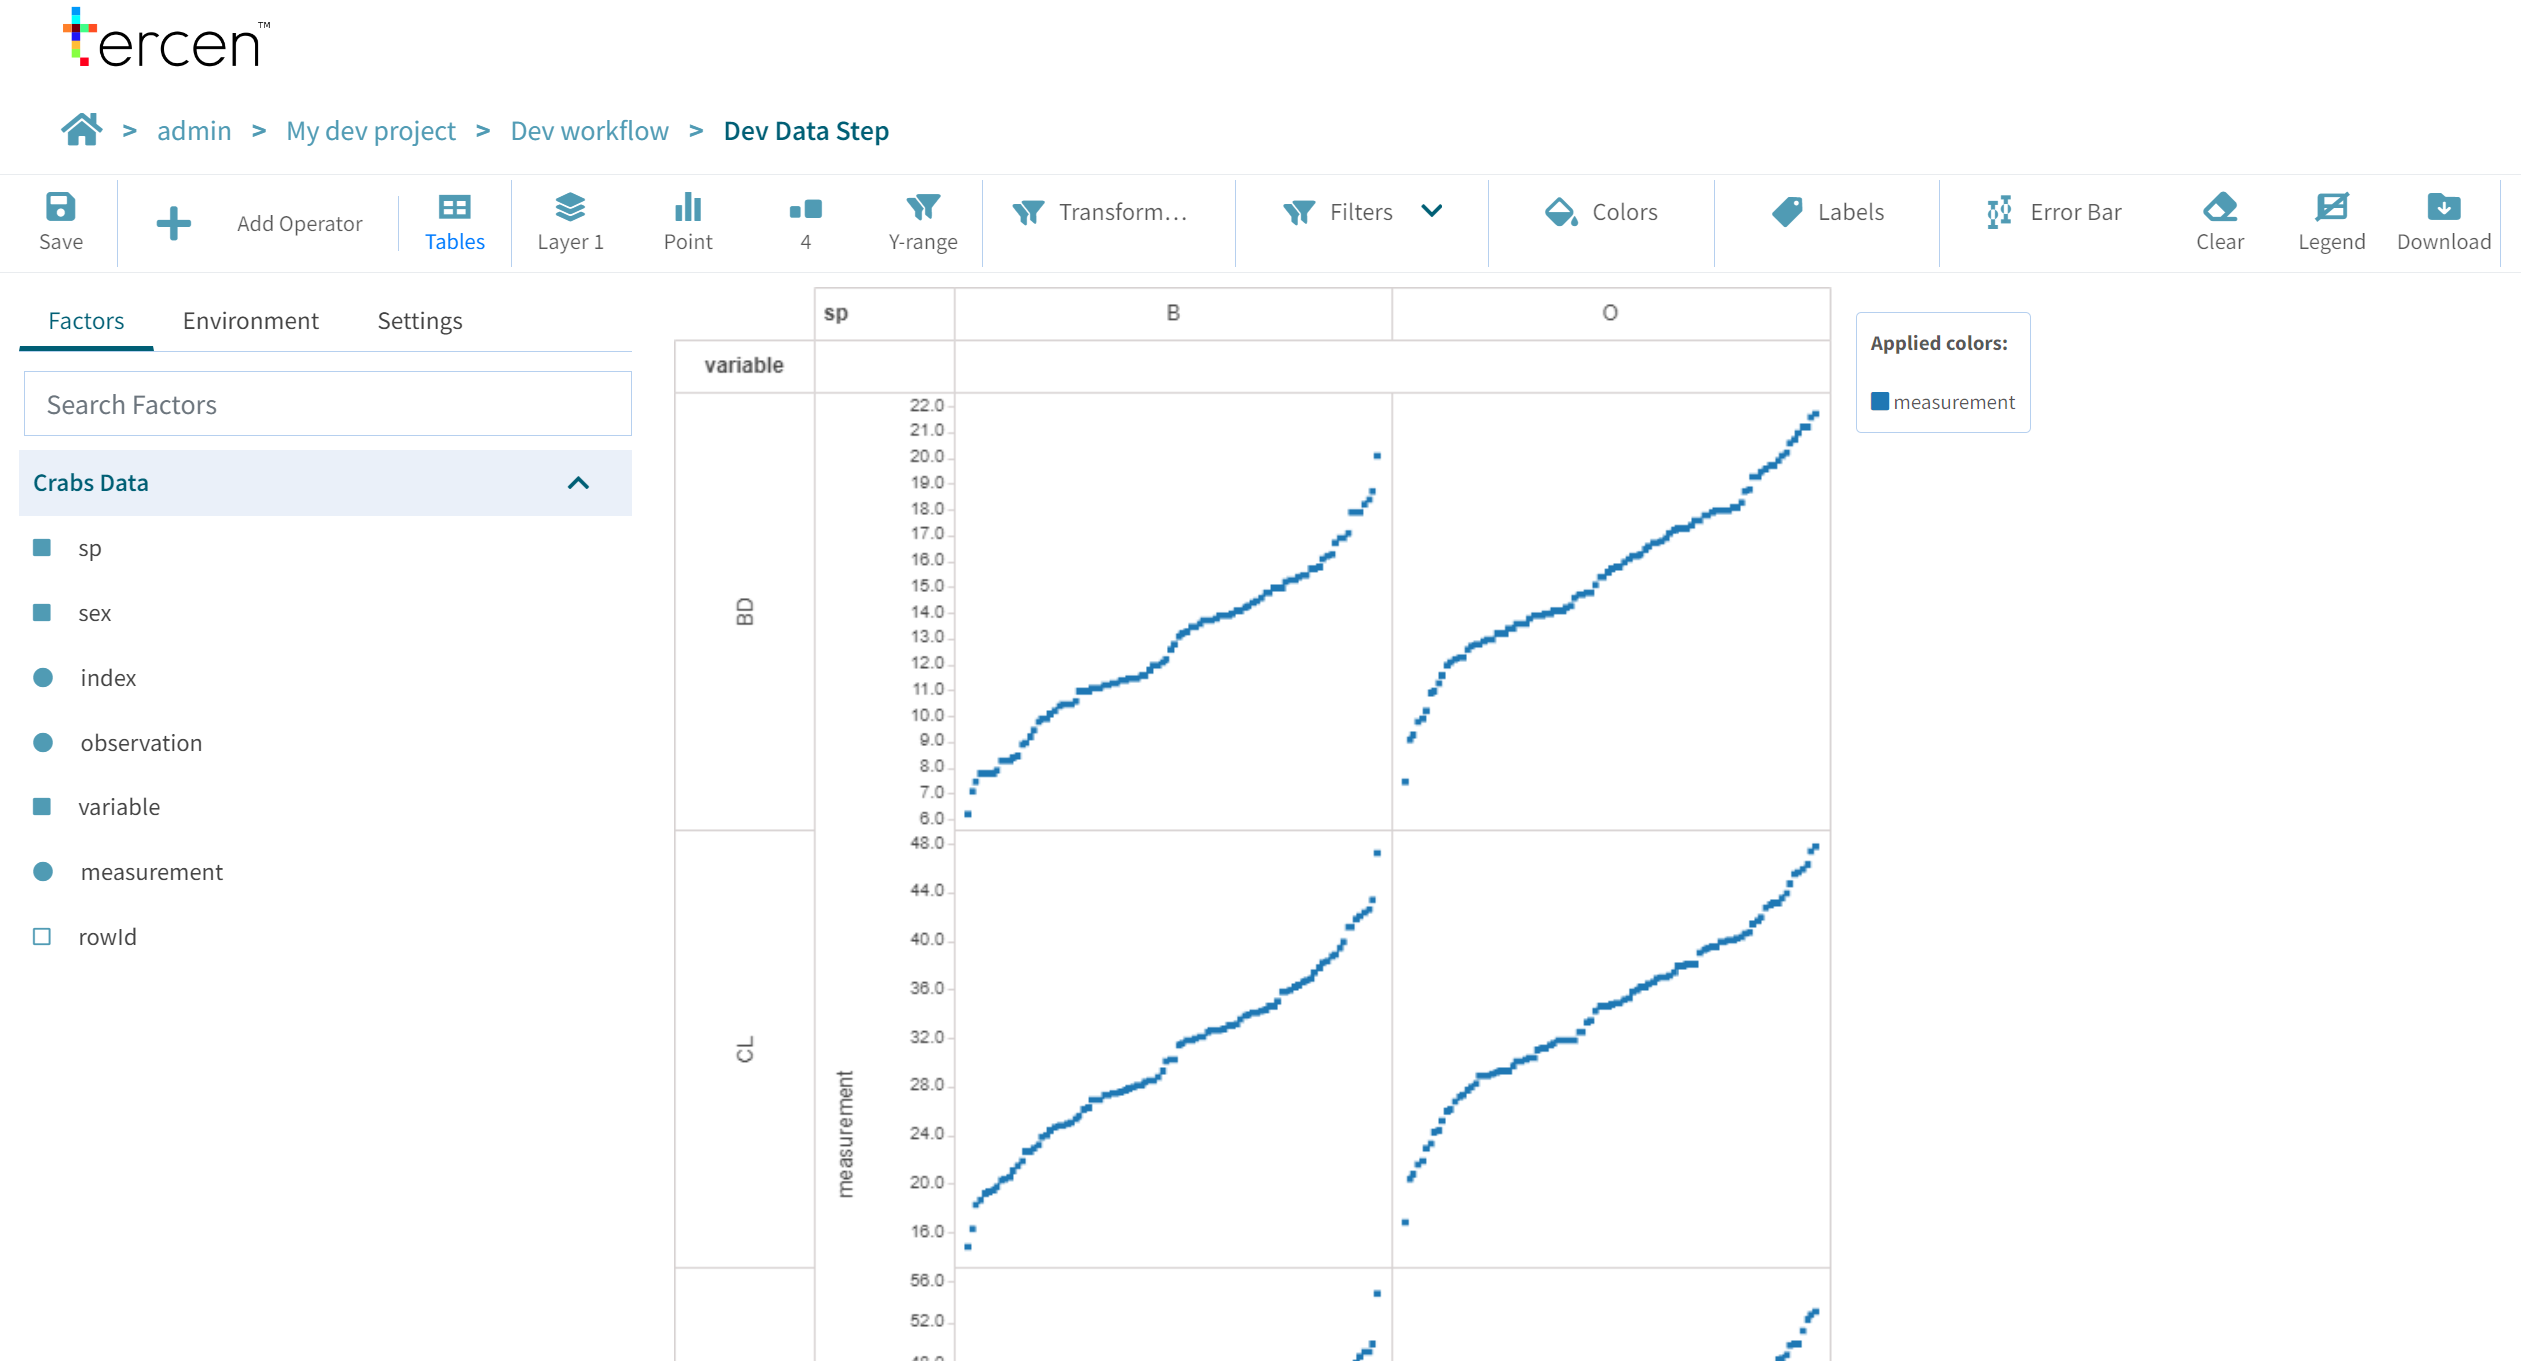
Open the Dev workflow and double click on the Dev data step to open the crosstab view.
This a an input data projection we have prepared in the purpose of developing an operator to compute the mean value of the y axis factor, per cell (i.e., the data is grouped using row and column factors). You should see the following projection:

Step 2: Set Up Environment and Install Core Requirements
Navigate to VS Code: http://127.0.0.1:8443/
If you open it for the first time, you might be asked to install some VS Code extensions. Accept and install the Python extensions.
Open a terminal in VS Code Server by clicking on the terminal icon in the lower left corner. Navigate to your cloned repository directory using the
cdcommand. Install the core requirements by running the following command:
Step 3: Interact with data through the API
The first thing we’ll do is to interactively work with the data we have projected in the crosstab.
To do so, you can get from the data step URL the workflow ID and the data step ID. Open the main.py file
and paste the following code:
from tercen.client import context as ctx
import numpy as np

tercenCtx = ctx.TercenContext(
    workflowId="YOUR_WORKFLOW_ID",
    stepId="YOUR_STEP_ID",
    username="admin", # if using the local Tercen instance
    password="admin", # if using the local Tercen instance
    serviceUri="http://tercen:5400/" # if using the local Tercen instance
)
Execute this code (Shift + Enter) in the Python console after having replaced the workflow and step IDs.
What does it do?
Now that we have initialised the Tercen context, we can interact with the data step. Let’s start by selecting some data:
What does it do ?
What does it do ?
You can check what is available in the Tables button in the crosstab. It contains the data that has been queried. You can look at it to get some inspiration. For example,
we can identify the .y, .ci (column index) and .ri (row index) factors that we have queried above, but more are available.
Now try to run the following lines of code:
Now you can play around with the API and check the output of various functions. What do they do ?
Here is a description of the most commonly used ones:
-
select(): select any factor specified in the arguments -
as.matrix(): gets data from Tercen in a matrix format (rows x columns, y values being used to fill the matrix) -
cselect(): select column factors -
rselect(): select row factors -
cnames: get column factor names -
rnames: get row factor names -
colors: get color factor names -
labels: get label factor names -
addNamespace(): add a unique namespace (defined in the data step environment within Tercen) to variable names -
save(): send back an output table to Tercen
We invite you to play around and test these different functions. They are mainly designed to retrieve data from Tercen, and send back output tables. In between, you are free to compute whatever you need.