Chapter 8 Understanding projects
Projects are another key concept in Tercen.
They are the “containers” where your research and calculations are held.
Projects can be set as private or public.
Private projects can only be viewed by the person or team that owns it. They can be copied and adjusted only by these people.
Public projects can be viewed and collaborated-on by the wider community. They can be copied by anyone and used as a basis for new research.
Projects have the following characteristics.
- A project is created by a Team.
- Data is uploaded to projects.
- Workflows are attached to projects - to analyse and create visualisations of data.
- Projects hold the record of comments and feedback submitted by your team or community.
- Supporting documents can be uploaded to projects.
Tercen provides two ways to create a project.
- Create New - A blank project which you will add data and workflows to.
- Clone - A copy of an existing project, which you then modify.
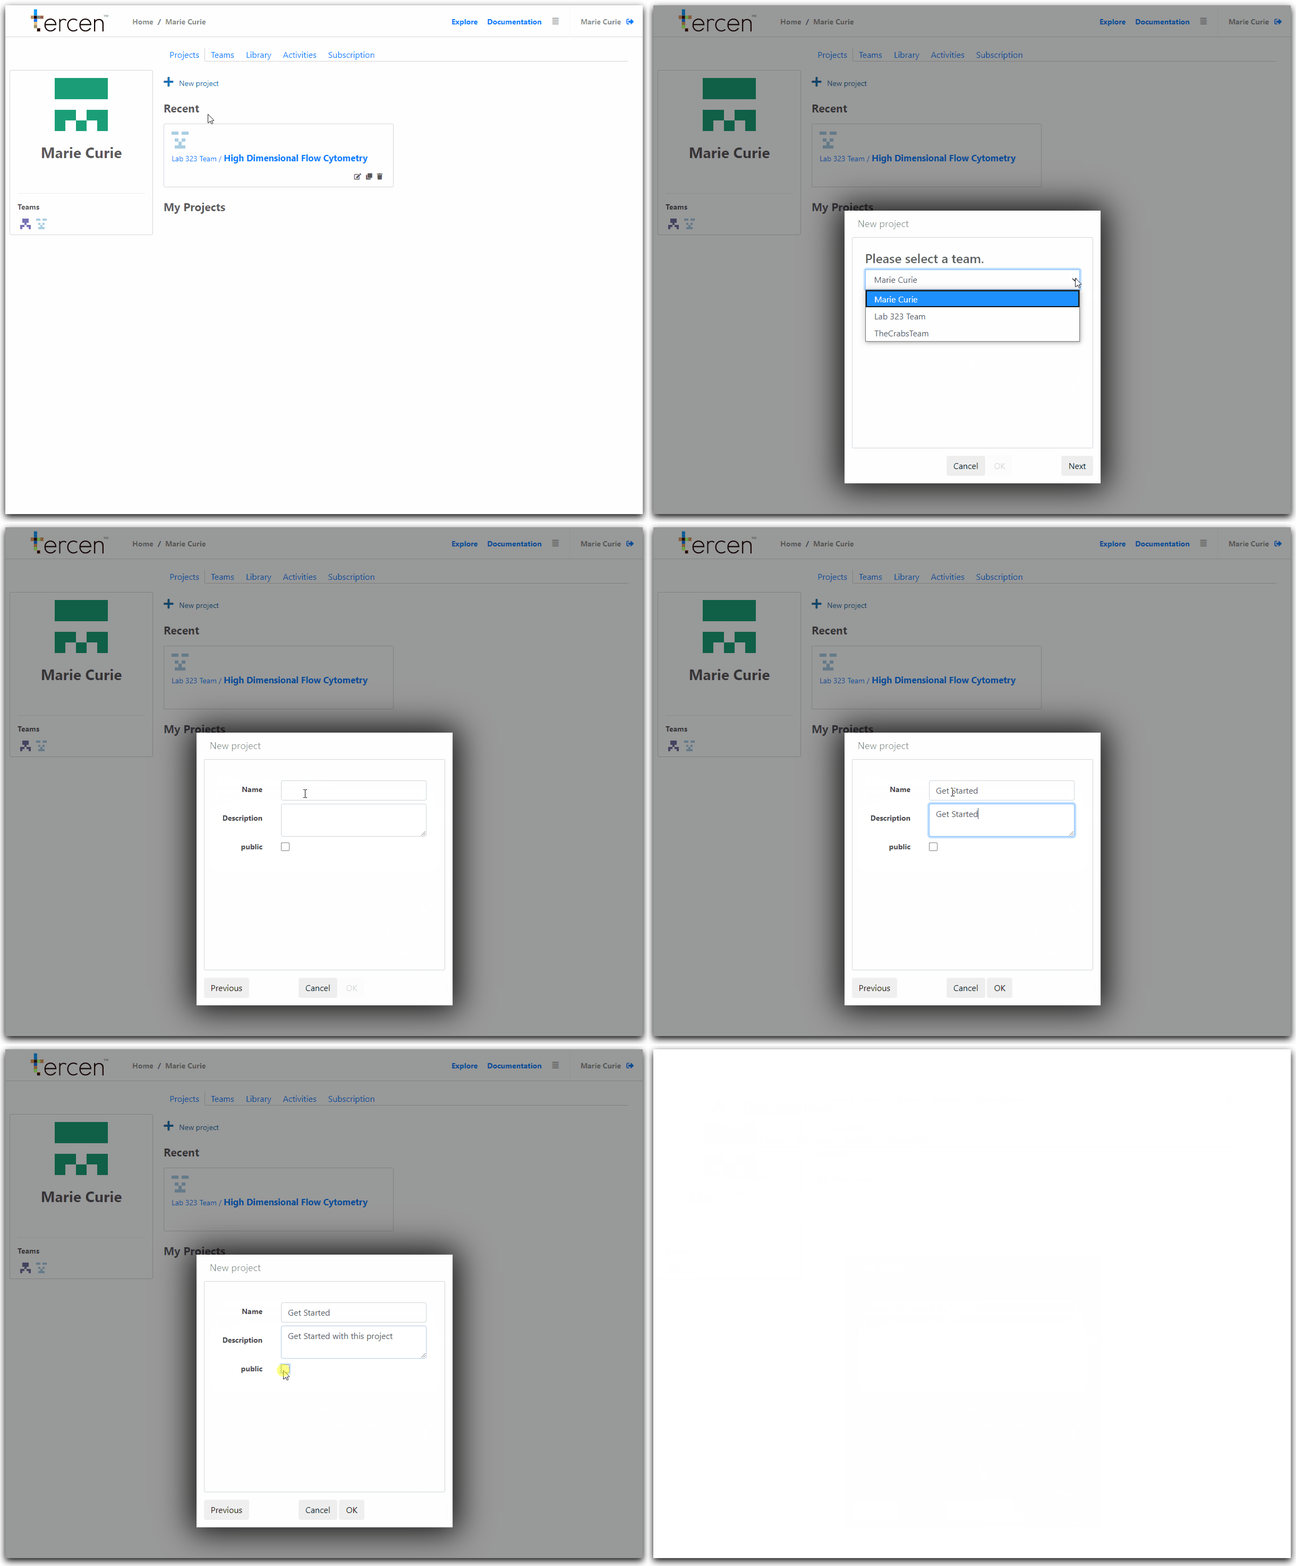
Create a new project
From your personal home page
Click the New Project Button
Assign the project to an owner. You personally, or a team.
Click the Next button.
Add a name and description of your project.
Choose to make it public or keep it private.
Click the Ok button.

From a Team page

Click the New Project Button
Projects created this way are automatically assigned to this team.
Add a name and description of your project.
Choose to make it public or keep it private.
Click Ok
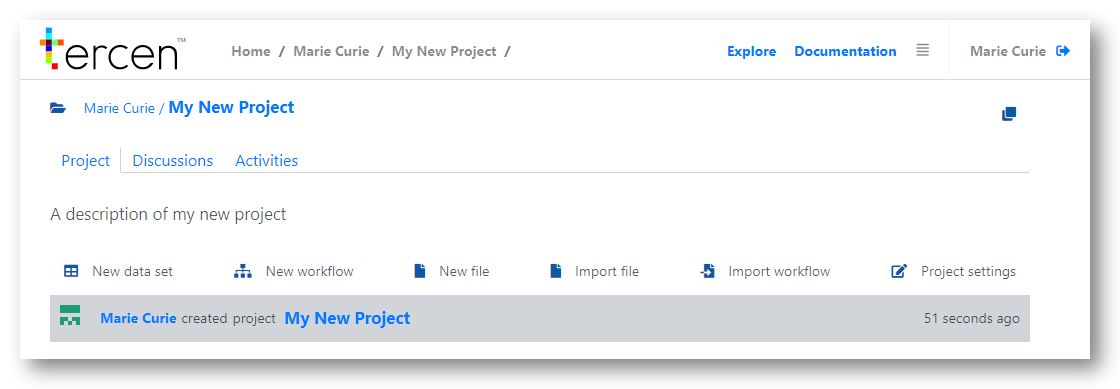
You have created a new project

Clone an existing project
The simplest method to create a project is to Clone it from a pre-existing one.
Any project can be cloned as long as you have access to it.
Personal projects, projects created by your team, and publicly shared projects can all be cloned.
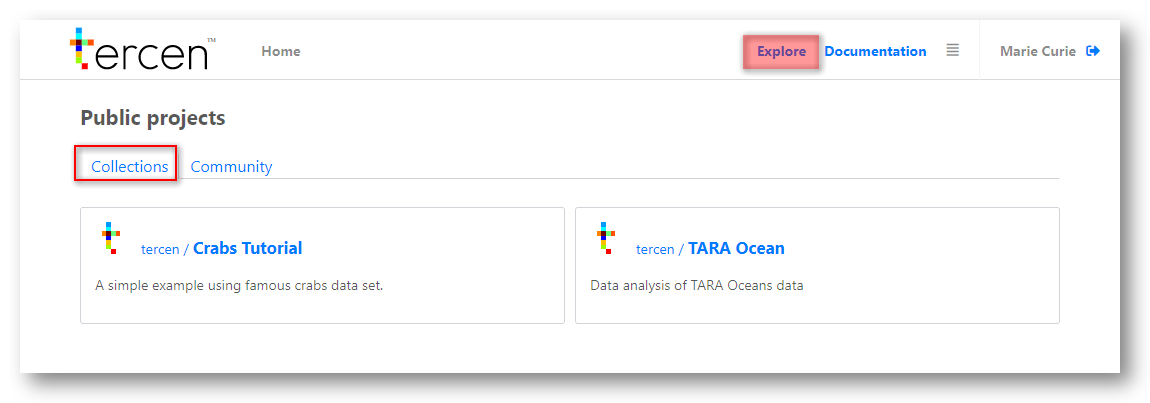
To access public projects on Tercen click the Explore link in the header bar.
You will be taken to the public pages.
It is divided into two sections.
Collectionsis where Tercen displays sponsored research examples.Communityis where all projects made Public by their creators appear.

For our example We will choose our tutorial crabs project in the Collections section.
You can read more about it here
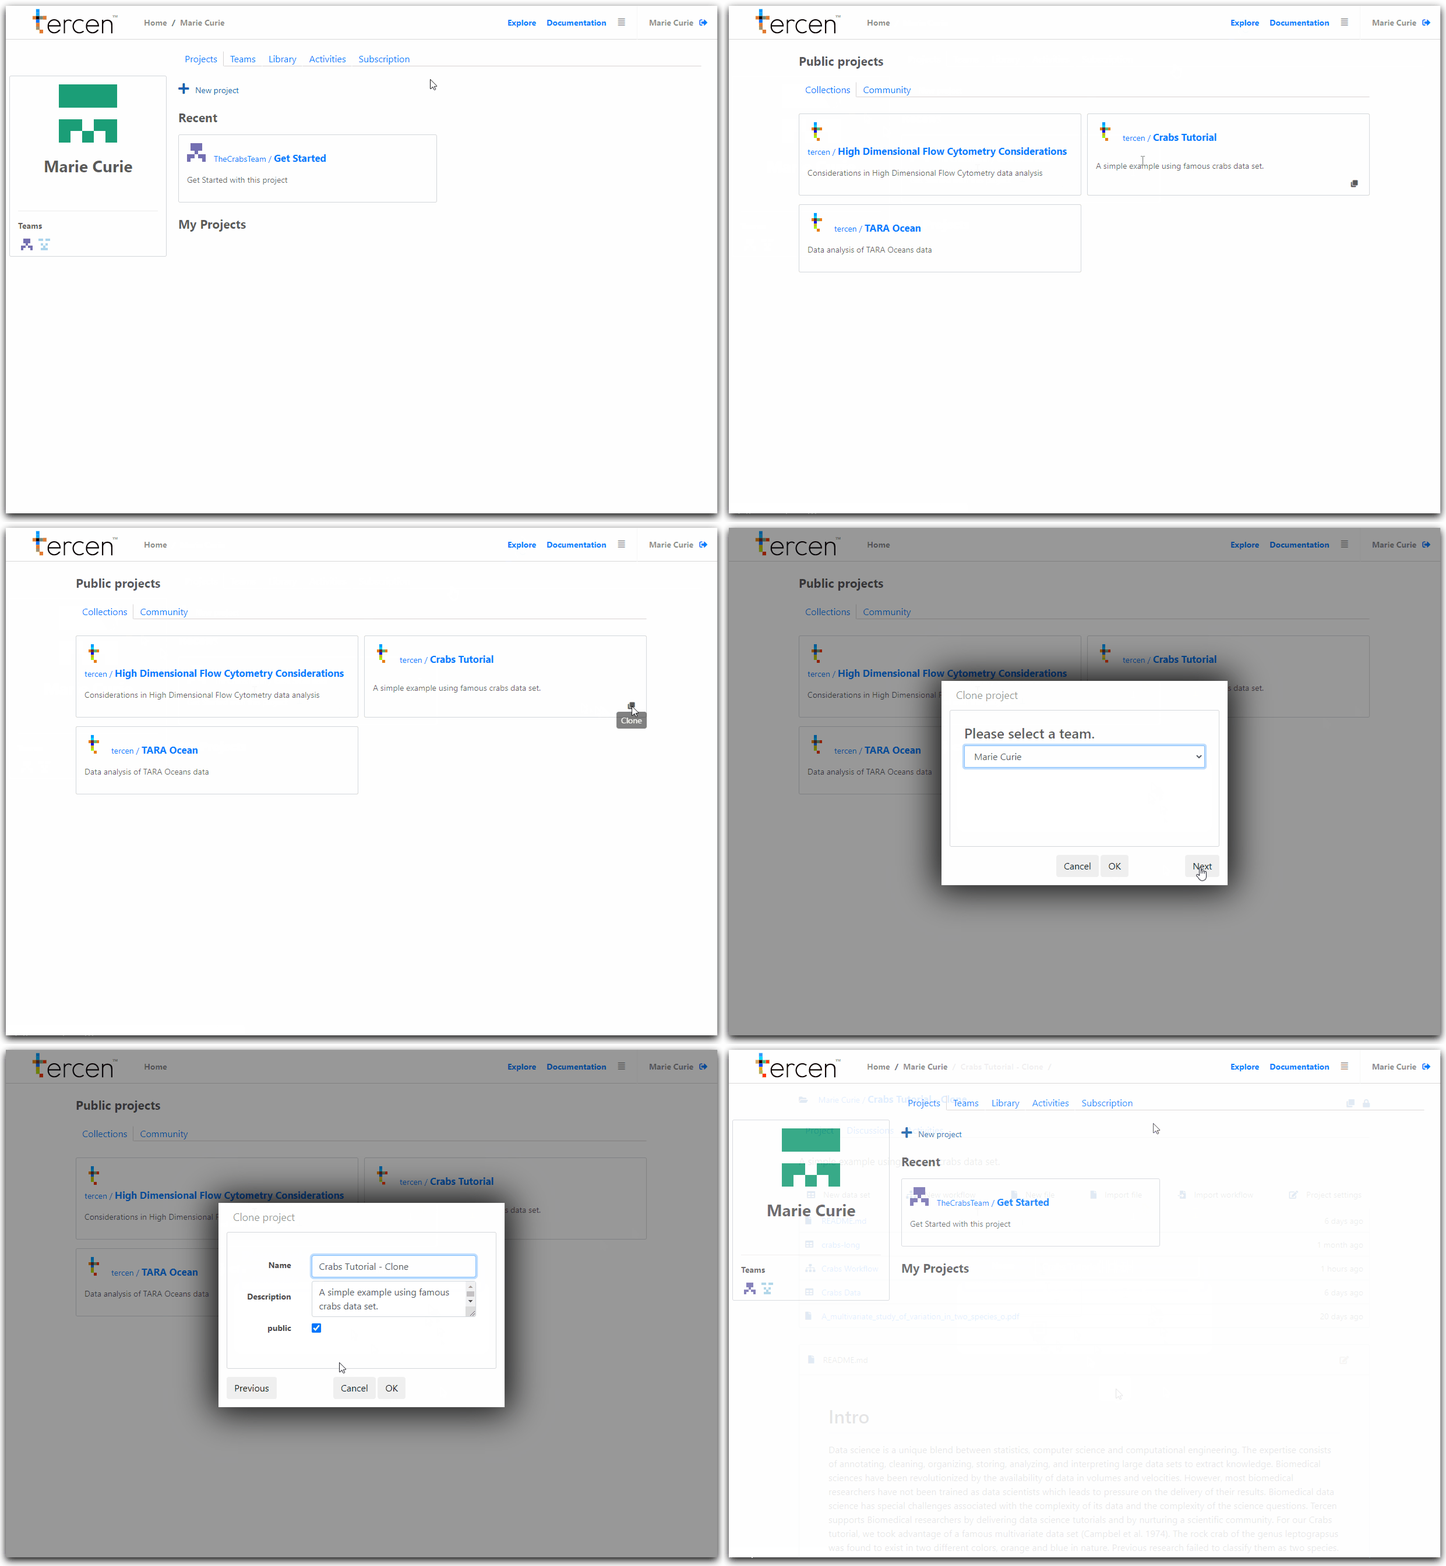
Click Explore
Check you are in the Collections tab.
Hover your mouse over the Crabs Tutorial project until the Clone icon appears.
Click the Clone icon.
Select the destination of the new project, your personal home page or, one of your teams.
Click the Next Button
Edit the name and description of your new project.
Decide if you want to make it publicly available.
Click the Ok Button

Cloning will copy the data, workflows, and supporting documents contained in the original project.
Discussion forum posts and activity histories are not copied.
These are re-set to be blank.
Your new project is now ready for modification.
Next… working with projects.